
Good bye old face-up!
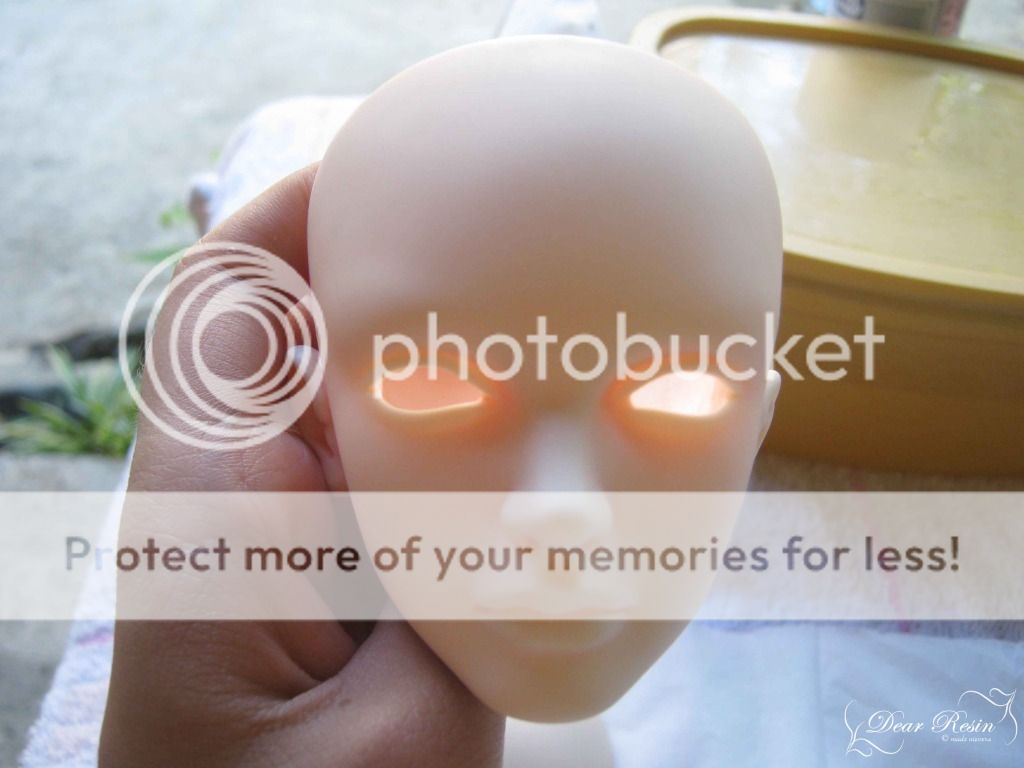
Thirty minutes later... Hello blank face!

My "workstation"
I used the following materials on his face:
- MSC Flat Spray (not shown since I was warming the can behind the fridge)
- Mungyo Soft Pastel Set (I bought the 12pc set since I won't be using it that much)
- Faber Castell Watercolor Pencils (Bought the 12 pc set since I only need the brown, black, and flesh colored pencils)
- Assorted Tamiya brushed
- Eraser Pen
- Mr. Color Thinner (not shown)
- Tissues, cotton balls and cotton buds
- X-Acto Knife

Guys, meet Mr. X-Acto knife (or Mr. X), my new friend. <3
I bought Mr. X a few hours before doing his face. He was kinda pricey for a single piece of blade, but every peso I spent on him was worth it. <3 I was able to remove every single bit of dust caught on the MSC layer without damaging the resin. For those who are about to try their hands on doing their doll's face-up, you should have this in your arsenal. Just be careful when using this because the blade is very sharp.

I don't have in-progress shots, but like before, I mainly followed this tutorial as a guide. After a few hours of blushing, shading and gulping Sprite while working, I ended up with this.

All sealed and glossed-up! Unfortunately, it was too late when I realized that his eyebrows are slightly skewed. OTL

New eyes in! Got the pair of Mako Eyes I ordered earlier that day.
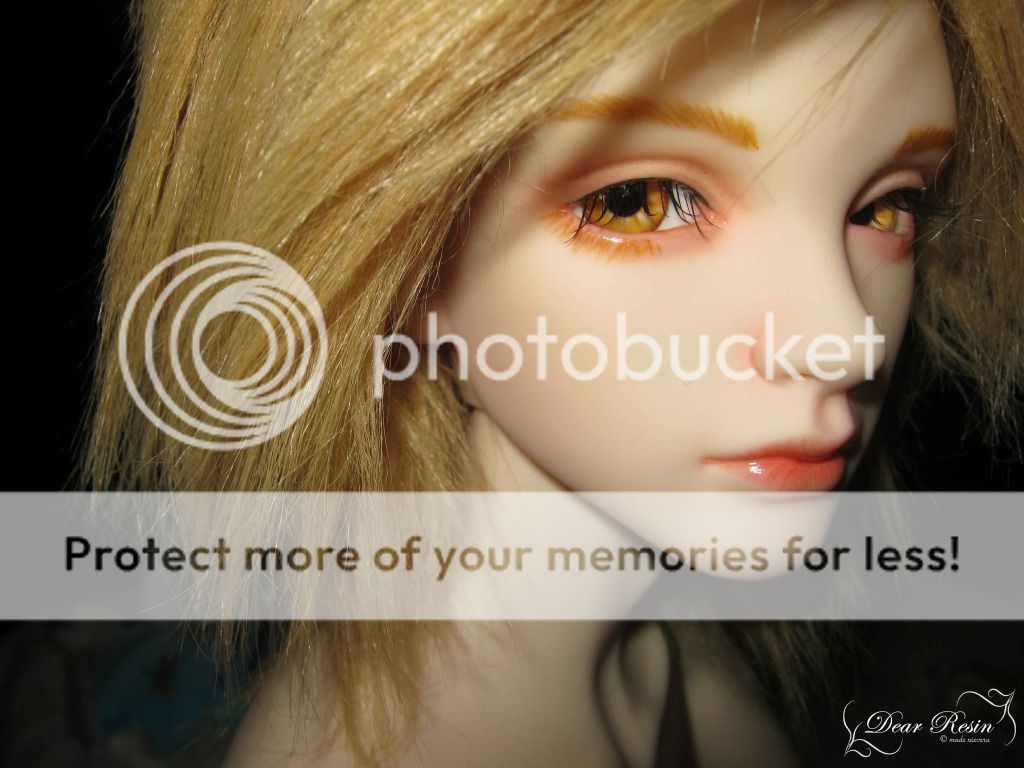
As mentioned earlier, one of my biggest issues about his old face-up is the eyeliner. It was too thick, too girly, too messy. So I decided to only put them under his eyelids to create depth, and carefully applied a thin line in front.

With his temporary wig borrowed from KA.
And finally, some eyelashes!

Fave shot *u* I think I'm obsessed with him again. <3
I used human false eyelashes on him. Simply cut an eyelash into three and use the two end parts (I saved the middle part for future use). I expected it to be too long for a doll but instead of trimming it, I opted to glue it inside his eyes instead of gluing it on his eyelid. By doing this, I avoided getting blunt-looking eyelashes (which you will get if you trim the lashes the wrong way) and got a more natural-looking one.
Here's a before-after comparison:

Noticeable changes:
- Cleaner eyebrows
- Lower lashes look a bit bushy in person, but it kinda works for me.
- NO MORE GHEI EYELINER WOOOOT
- Much more manly looking. Also, I think he doesn't look very arrogant now.
- Eye bags are more heavily blushed (intentionally)
- Oh God, bakit parang di ka na ganun ka conceited ngayon?! What is this sorcery Axis?
One of the things I learned after doing his second face-up is that MSC really does tone down blushing. I was initially scared that his eyes will look too pink after blushing, but after coats of MSC, the colors toned down to a nice pinkish tone.
***
Some extra shots:

He looks pink here. Ugh, my camera is weird.
Axis: Hey there!

Er.. Lion King?

Axis: This is kinda tiring. >.> (Me: Ugh, that smirk!)
And finally...

Not the most flattering photo of my resin kids, but this will do for now (Alice is also wearing her new eyes).
I think we can do photostories now. *u*
Thanks for looking! <3
No comments:
Post a Comment
Leave your message here!